Ever wonder how professional photographers do it? You know, get those perfect magazine-worthy interior shots that make even the blandest space look awesomely good?
For most of us, interior photography is a minefield of disappointment just waiting to happen.
Sure, we take lots of pictures indoors at gatherings of family and friends knowing full well that they won’t turn out as we imagined. Some of us have even come to accept the fact that our efforts at interior photography shall be forever plagued by clutter, bad lighting and Aunt Martha’s brown and orange crocheted afghan.
Now, imagine being able to take photos that express your personal style perfectly. Or, how about capturing the beauty of your home in a few great shots before you list it for sale (Aunt Martha’s afghan not included). Whether you’re creating a family keepsake or finding the best angle for that insurance valuation, we have a few tips that will help you show off your digs in the best light.
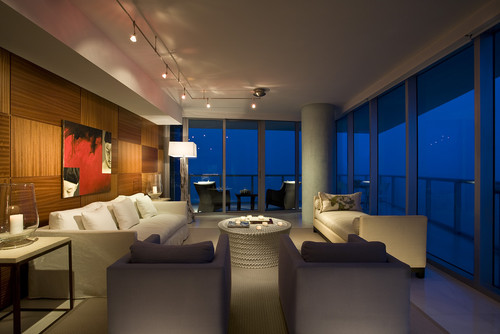
Rooms, like people, have certain angles that are more photogenic than others. And, since it’s impossible to photograph an entire room in one shot, you’ll have to select your location carefully.
The best way to do this is by finding the most interesting angle and composition of the room in question. Showing a room’s best view means capturing the most important objects and details while getting as much of the room into the frame as possible.
Lighting
Great lighting can make the difference between a photo that goes beyond your expectations and one that’s destined for the recycling bin. Maybe it’s because most of us think we need fancy equipment to get it right but, lighting is one element of interior photography that people have the most trouble with.
Lighting is a crucial element to the success of your interior photography efforts. For instance, avoid taking photos directly facing a window with sunlight streaming in as you’ll end up with a bright blob in a dark room. Instead, try taking pictures at an angle to windows or at dusk instead of midday.
When it comes to using indoor lighting, here are a few more techniques that you can use to get the best results.
Avoid fluorescent lighting at all costs. Florescent lights cast a greenish tinge that may not be noticeable to you at the time, but will definitely register in your photos. Instead, try a couple of tungsten bulbs that will register as a warmer tone or a full spectrum light bulb that mimics sunlight and registers as white.
Turn on all the lights before you begin. Even if it’s daytime and you are shooting with natural light, the further you get from the windows, the less natural light you’ve got to work with.
This may sound counterintuitive but, don’t use your flash. Camera flashes create shadows, glares and unnatural looking light. Instead, turn the flash off and mount your camera to a tripod to avoid blurring the picture while capturing your shot. And, if you’re really serious, purchase individual strobe flashes that can be placed throughout the room for more even lighting.
Highlight Your Subject
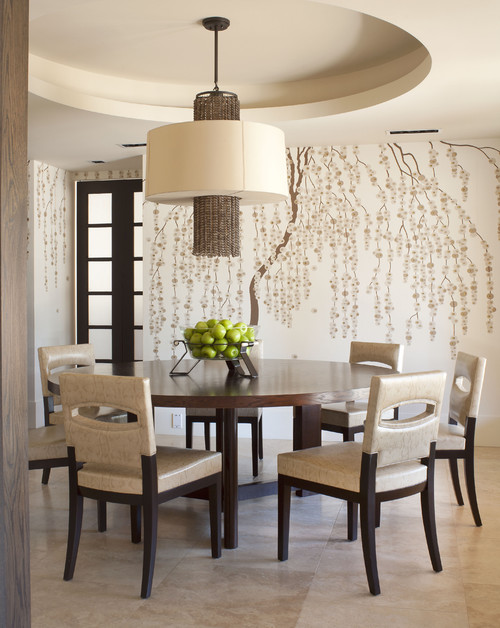
When photographing an interior, it isn’t the room itself but, rather an element in the room such as a painting, fireplace, staircase or piece of furniture that you’ll want to call attention to.
The obvious solution, of course, is to center your view on the subject in question. However, that’s not always possible or even desirable when creating an interior composition. And, simply taking a close up picture could mean losing the context of your subject.
So, what to do?
Call attention to it within the composition with colour and light. Placing a vase of brightly coloured flowers on your dining table will help it stand out. Styling a composition of accessories on or near your focal point will draw the eye there. Using light to spotlight an area can also do the trick.
If you’ve ever thumbed through any home magazine and marveled at how polished the interiors look; every accessory and accent placed just so, sofas that look as if they’ve never been sat on and rooms that appear to be void of any sign of human life, know this: it’s not reality.
The reality is that someone was on set moving furniture and clearing away the clutter of everyday life just to get that one perfect shot.
So, before you start clicking away, clear away the clutter. Hide those newspapers and remotes, clear the overstuffed pillows from the sofa and move anything that isn’t a must have element of your photo out of the frame.
Experiment
You won’t know how a photo really turned out until you actually download it and view it on your computer. What looks crisp and clear on your camera screen may actually be blurry, dark or grainy once enlarged.
Make sure to take lots of photos of your room from different angles, camera settings and light levels. Experiment with staging furniture and coming in up close or far away. Most importantly don’t judge your final photo based on what you see on the screen on your camera. Remember, you may find that perfect shot in the most unexpected places.